Saturday, 17 October 2020

15mm Sci fi - Saturday Alien Double Feature, GZG Ixx & GZG Phalons

 Winter is Coming.

It was cold this morning.  4C.  This means only one thing: soon I will have to move my painting studio from the garage into the house.  Cold does mix with compressors or paints.  I do not have a dedicating painting area in the house, so this may slow my progress towards my 2020 miniature painting target.

However, today we have a double feature: GZG Phalons and GZG Ixx.  I painted the Phalons earlier this year, while the Ixx were done last night.  Years ago I did paint both of these ranges but sold them off.  So, consider this GZG Aliens 2.0.

The Ixx were a bit of a pain to fit together.  The legs need a lot of filing to go in correctly.  Other than that, there were no mold lines to speak of.  This was the first time I used GW Contrast Paints to finish a whole model.  The scheme was:

  • Tamiya Gloss White undercoat
  • GW Contrast Paint Plaguebearer Flesh on all skin
  • GW Contrast Paint Creed Camo on the packs
  • GW Contrast Paint Black Templar on the weapons
  • GW Contrast Paint Nazrog Yellow for the underbelly 
  • GW Contrast Paint Basilicumm Grey on the cans
  • Matt black for dots and spots (bugs need spots...lots of spots)
  • Washed in Minwax Polyshades Pecan

GZG Ixx Aliens

In my games these aliens are Vallax (from the Rifts RPG), not Ixx.  The Vallax are malevolent aliens from the 9th Dimension.  They use their master of magic and PSI Powers to enslave the multiverse, using captured aliens as Thralls.  Yellow Bug Bad!


In nature yellow and black indicate danger, Stay away, I am a dangerous bug".  Plaguebearer flesh over white gives a nice yellowish, slightly green color.  Combined with matt black it makes for a perfect insect carapace.  The Pecan Minwax wash finished it off and made the whole model softer looking and more organic.

Shake That Ass!

When magic and PSI are not enough the Vallax use antimatter pulsar weapons, blasting foes to atoms.

"Eye see you."

The Vallax are typically the commanders of either the Phalons or the Xar.  There are not many of them, but that is the nature of their life cycle.

"Submit Thrall!"

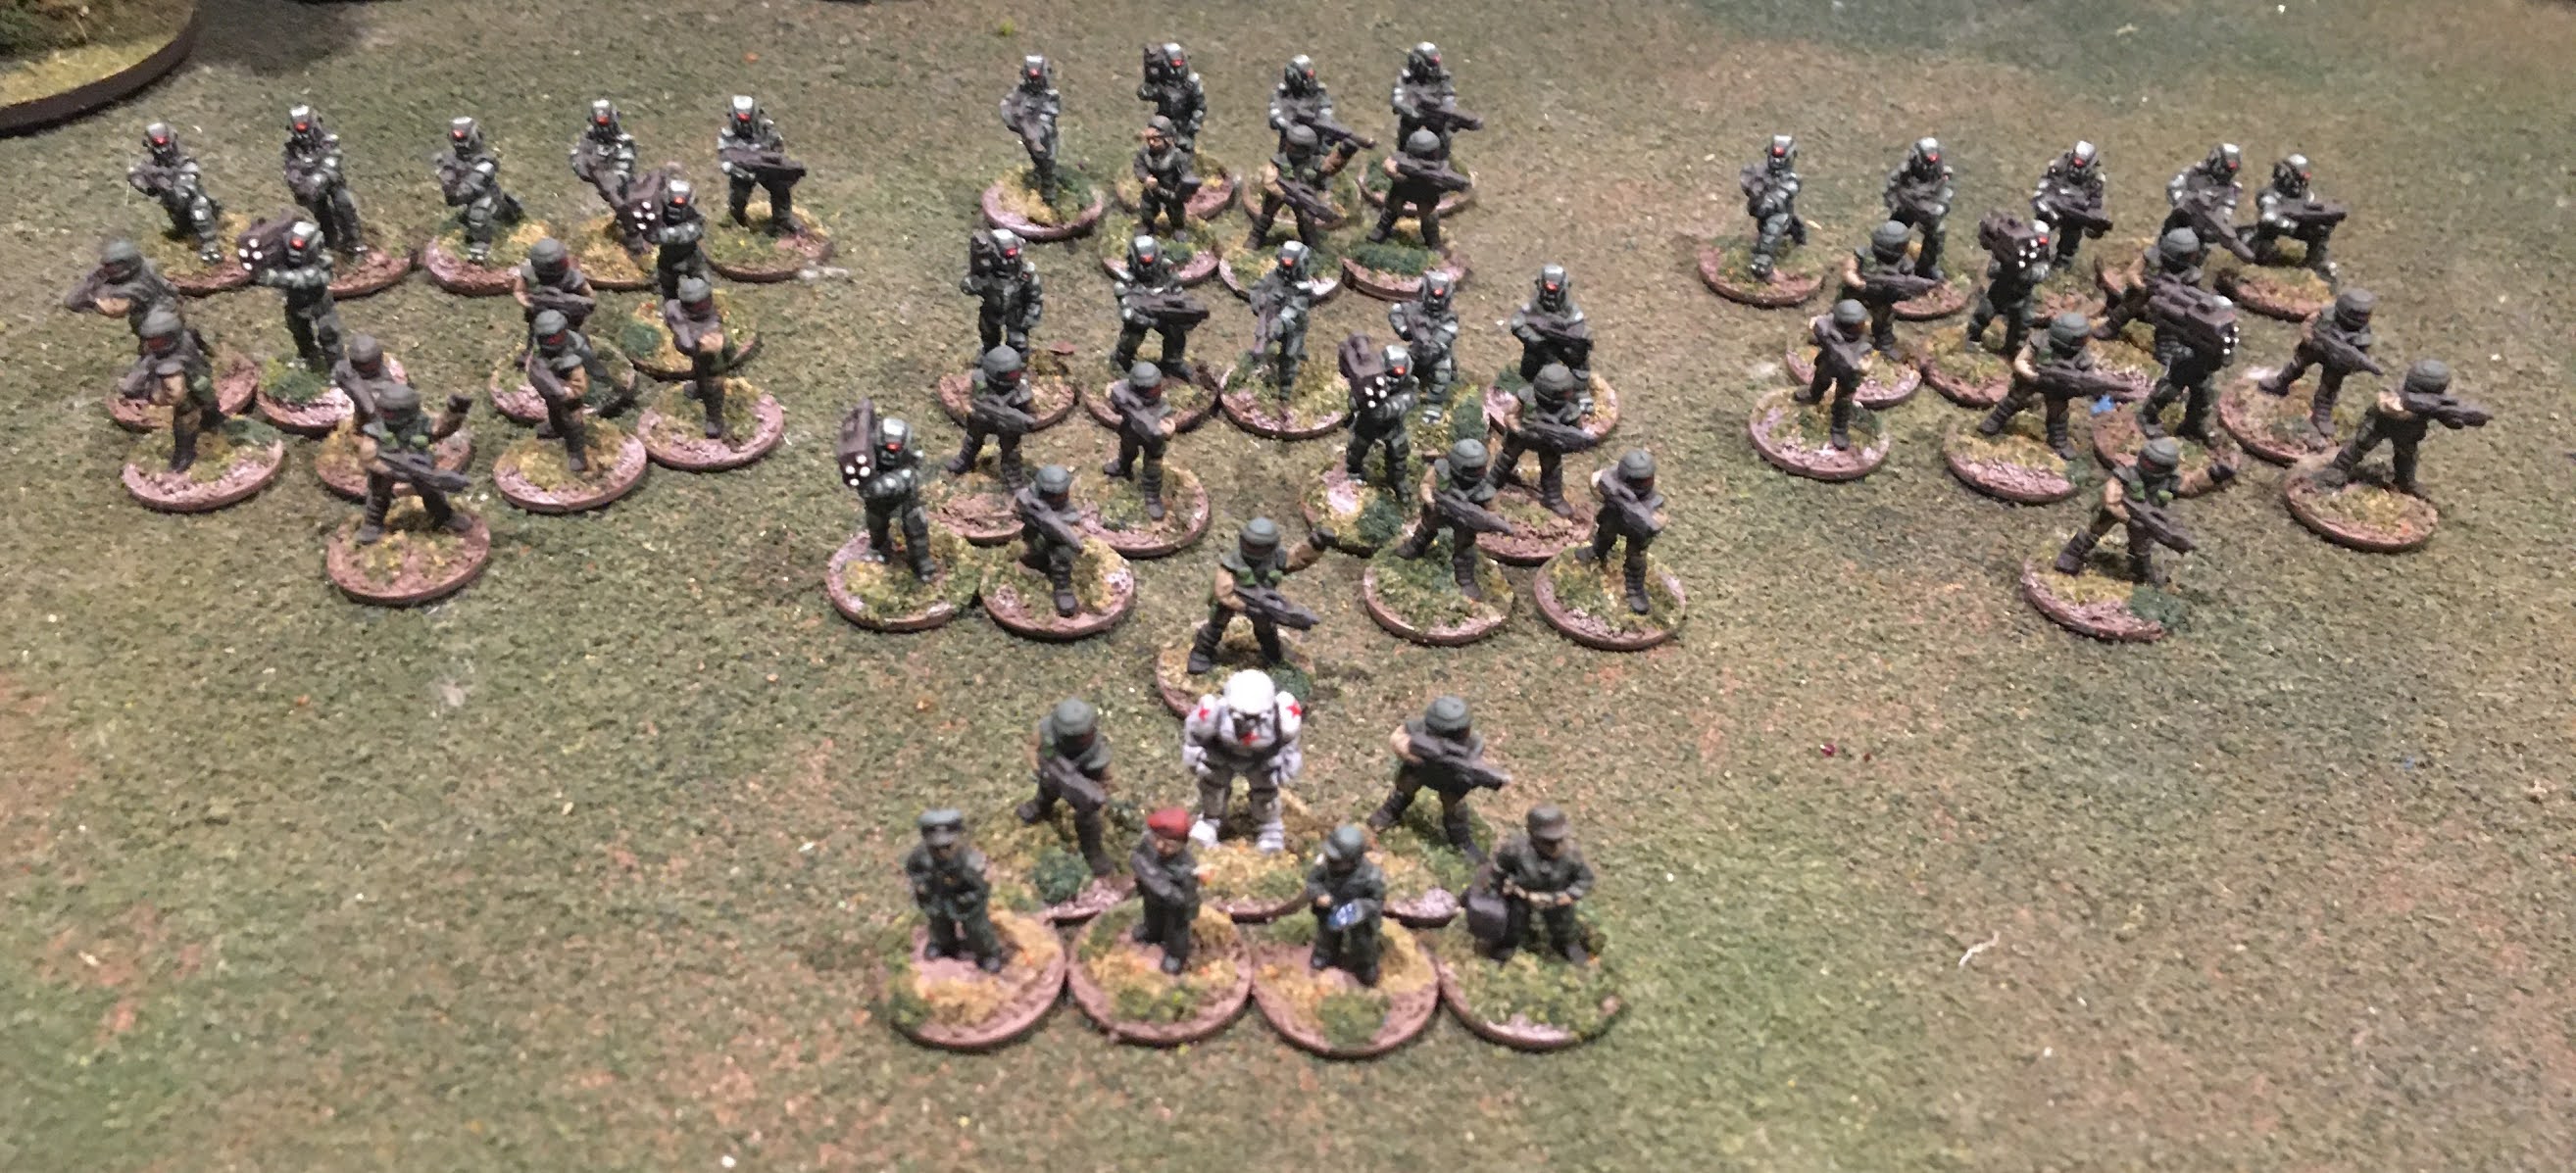
Moving on to the Phalons.  This force contains 48 of these weirdos.  That was quite by accident.  I ordered some, forgot, and ordered more.  Oh well.  The models needed little clean up.  There is a mold line on the top of each head which needs filing off and the rocket launcher is a mess, needing filing and drilling.

The range is small, like all of the older GZG lines.  Jon has no plans for the near future to expand the range.  That may change of course.  They come with a support weapon, sniper rifle and rocket launcher.  Phalons use organic technology and frankly I was stumped on how to paint the weapons.  So I used a dark grey.  Not original I know.

The scheme was very simple:

  • Tamiya Green Grey (I used Tamiya JA Grey for some of them, creating slightly different skin tones)
  • GW Contrast Paint Plaguebearer Flesh
  • GW Green Wash on the blackpacks.
  • Red Eyes with a white center dot (pain in the ass this was)
  • Washed in Minwax Polyshades Pecan.
  • Highlighted with Reaper Light Olive (I think)

GZG Phalons

For vehicles I pair Phalons with either Old Crow Alien Tanks/APCs or Rebel Minis Martian Walkers.

GZG Phalons

more GZG Phalons

The Minwax Pecan tone is perfect for creating shading on earthy tones, without going overboard on the dark hue.  A darker brownish tone would not work near as well as Pecan (which is basically identical to Army Painter Soft Tone BTW).  Pecan goes on kind of redish.  Dont be alarmed.  It changes color as it dries.

even more GZG Phalons

In hindsight, I am not 100% happy with the scheme.  It is a little muted and I would prefer something brighter. (plus they are very close in color to my Xar).  In the future I will likely do another batch in the same scheme (or close to it) as the Ixx, going for a yellow, or perhaps orange.  That is far off though.

That concludes alien Saturday.  My painting queue is still full (and I just hit 1600 models painted this year so far) as are all my foam trays.  Looks like I need to order more.  


Friday, 16 October 2020

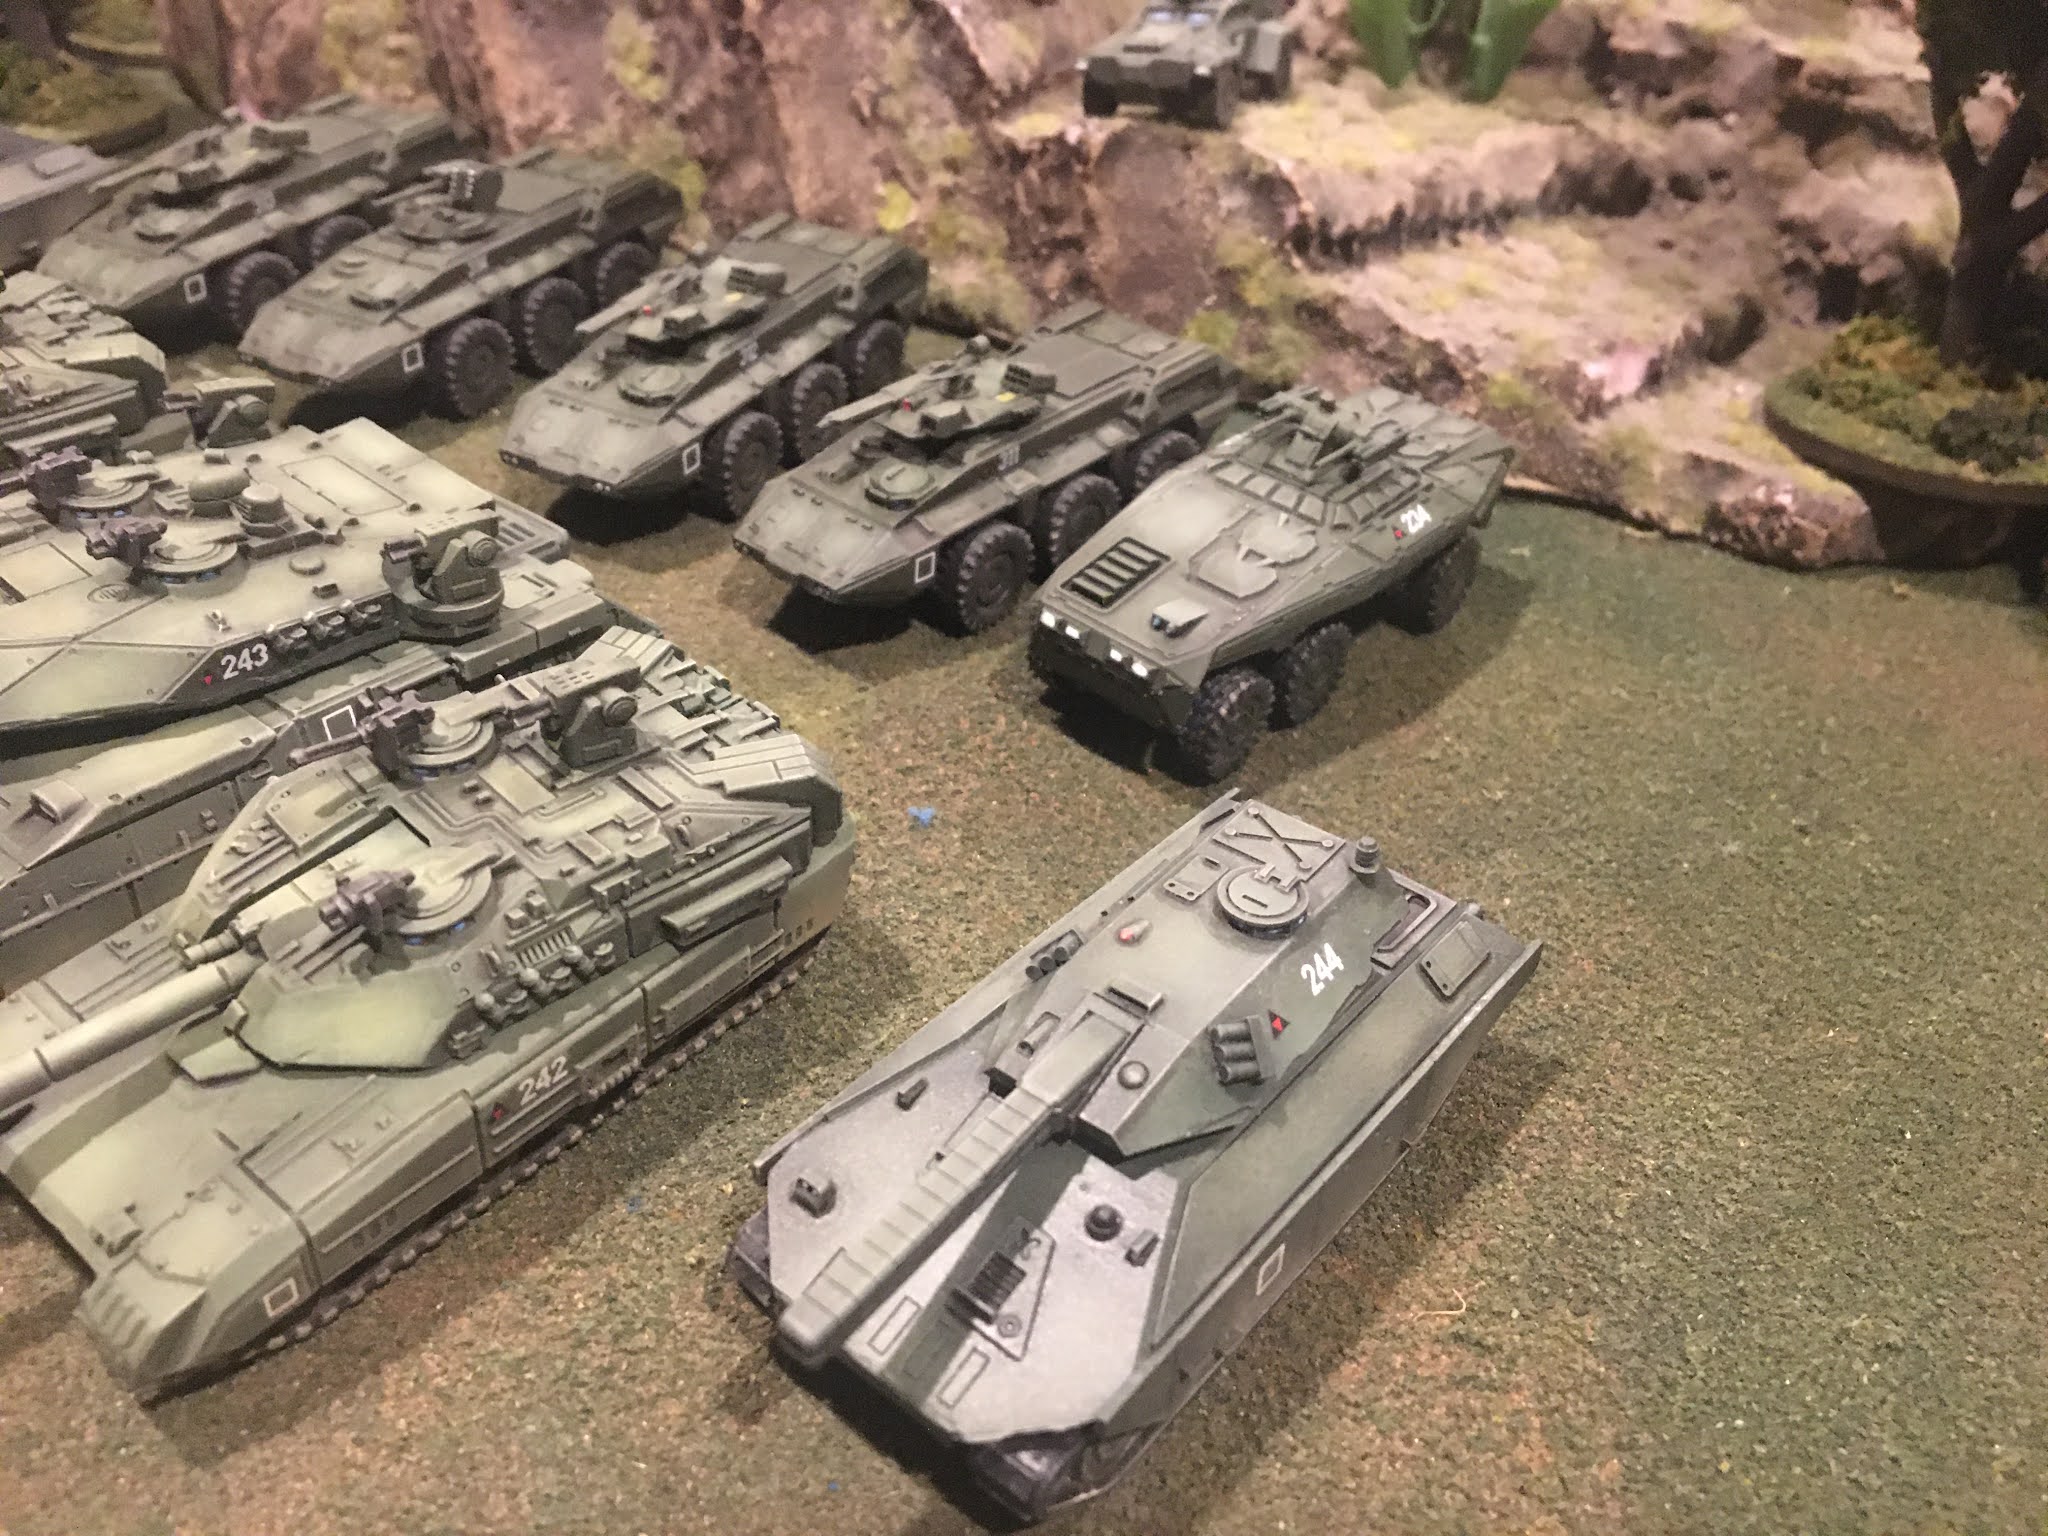
15mm Sci Fi - Tomorrows War US Army Armored Vehicles

 Previously I featured my US Army Light Infantry Platoon for Tomorrows War.  That formation typically has little armor support, being air transportable and not designed for high intensive conflicts.  When those missions come calling more firepower is needed.

The vehicles below were airbrushed in a basic NATO green scheme.  Nothing fancy.  Having large flat areas allowed me to do some of my usual color modulation tricks to make them pop a little more.  The Antonitis APCs have less flat areas so the modulation is not as great as on other vehicles.

I did the vehicles at different times, using different paints for the APCs vs the tanks.  This is not my typical approach.  The fact was that I did not have all the vehicles in my inventory at the same time.  Oh well.

  1. Tamiya NATO Black as a primer (Khurasan tanks received a Vallejo Russian Green Primer instead).
  2. Tamiya Black Green in recessed areas.
  3. Vallejo/Tamiya NATO Green on all upper areas.
  4. Vallejo Camo Green, Light Camo Green applied on panel centers (the 3 Khurasan tanks only).  On all other vehicles I only used Tamiya Cockpit Green as a final highlight.
  5. Vallejo Light Green applied as a final highlight on the 3 Khurasan tanks.

Tomorrows War US Armor

US forces are equipped with all types of vehicles, from expensive grav tanks to more traditional track and wheeled vehicles.  Personally I find the latter slightly more believable in most settings (although I have both in my vehicle pool).

Perkins Superheavy and Patton MBTs lead the charge.  Models by Khurasan


Karbardin V IFVs and an older M5 Cobra MBT (early plasma gun armament).  Models by Antonitis Workshop and Darkest Star


Karbardin Command IFV with M4 Python MBT (Railgun main arament).  Models by Antonitis Workshop and Darkest Star


Recon Elements and Scorpion Mobile Gun System for fire support.  Models by Antonitis Workshop and Darkest Star


The vehicles turned out rather well.  I did experience problems with the Khurasan models however.  They required some rather extensive clean up and they have mold lines in areas which I would consider a major flaw in overall design.  Sadly the Antonitis Workshop vehicles are long out of production.  They are now collectors items for sure.

Thursday, 15 October 2020

15mm Sci Fi - Tomorrows War US Army Light Infantry Platoon

This week I decided that rather than painting up new forces that I would get around to finishing off models for armies that I already have done (or almost done).  It is also less stressful for me since painting small batches of models is more fun than whole platoons at once.  So, on Wednesday I banged off the last 16 models for the force described below.  

As I have stated earlier this year, I like GZG's Cal-Tex models.  I am a sucker for full face helmets and I really like the design of these ones.  Sadly, the range of poses is quite limited, but, I have a feeling that we will see some surprises from Jon at GZG in the near future.

I use the Cal-Tex range for the US Army in Tomorrow's War.  Combined with the GZG Generic Command pack and GZG Civilian Technicians I have all the figures I need for the human portion of the platoon.  The GZG NAC would be a better choice for this nation, but, for the time being I am not collecting that range.  

The platoon consists of 30 men, 25 AGPs, 1 Medical Droid and 5 MULES.  I have not painted up my Old Crow MULES for this force yet   

HQ Squad: 

  • Platoon Leader with M1 Advanced Combat Rifle (ACR)
  • Sergeant with M1 ACR
  • Battle Technician with M1 ACR
  • 2 Riflemen with M1 ACR
  • Medic with M1 ACR
  • Autonomous Medical Unit
  • MULE Command Unit with 3 Grav Sensor Drones

3 Infantry Squads, each with
  • 1 Squad Leader with M1 ACR
  • 4 Riflemen with M1 ACR
  • 2 Gunners with M233 SAW
  • 2 Autonomous Gun Platforms with SLAM Launcher [Shoulder Launched Assault Missile]
  • 4 Autonomous Gun Platforms with M41 Gauss General Purpose Machineguns
  • 1 Autonomous Gun Platform with Multi-Purpose Plasma Cannon 
  • 1 MULE Transport


Weapons Squad:
  • 1 Squad Leader
  • 3 Autonomous Gun Platforms with Multi-Purpose Plasma Cannons
  • 1 Autonomous Gun Platform with M41 Gauss General Purpose Machinegun
  • 2 Battle Technicians with M1 ACR


It is unlikely that this full TOE would be fielded in a single game.  Being a light infantry platoon this formation has no armor attached to it.  It relies on either air or leg transportation to get to the fight.  

There are of course more Cal-Tex troops painted up than are shown in this photo (riflemen and RPG gunners).  Apparently the US Army prefers robots to meat sacks for their heavy weapon carriers, so those boys sit in barracks.  

Tomorrow’s War TOEs for the various nations are not equal, strength wise.  A DPRG platoon is vastly outgunned vs a US Army platoon for example.  Being a scenario based game it is incumbent upon the players to figure out what makes for an exciting game for both sides.   Simply lining up two platoons is unlikely to give either a balanced or enjoyable game.  

Tuesday, 13 October 2020

15mm Sci Fi - Thanksgiving Miniature Feast, GZG Mercenaries, Colonial Militia and 4Ground Buildings

Due to my wife working again this weekend I had some time for another two day miniature painting  marathon.  In the queue were 70 GZG bareheaded Mercenaries and several packs of the new GZG Colonial Militia (with some special weapons thrown in courtesy of Jon at GZG).  I have been meaning to do an irregular force for Tomorrows War for years and I figured it was now or never.


The scheme I choose was the same as my regular Mercenary force.  I wanted to be able to blend them in if necessary.  In total, 70 figures.  The Colonial Militia reminds me of German Afrika Korps, which suited me just fine.  Also thrown in were the character models from the GZG Assault Team pack.


A few heads were swapped out for gas masks.  Can you find them?

The figures were all completed on Saturday.  Sunday saw another marathon: MDF building assembly.  I already have six 4Ground buildings that I assembled a ways back.  However, I had another six sitting in queue.  Each takes me around 60 minutes to complete.  Needless to say I was NOT looking forward to this project.  I hate assembling MDF kits.

Some of the MDF parts are fiddly.  However coming pre-painted is a bonus since I am truly lazy.


The bareheaded model skin and hair were painted in various GW Contrast colors.


 Well, that wraps up another two projects.  I still have a ways to go however from clearing my mini inventory.  

Wednesday, 7 October 2020

15mm Sci Fi - Mercenary and DPRG Heavy Weapon Teams done...what now?

Last night I was rummaging through my 15mm bits box. Sometimes just thumbing through stuff will spark an idea for something I have not done yet. As usual I was not dissapointed: two old GZG plasma guns and 4 unused generic helmeted weapon crews (the same ones I used for my GZG Mercenaries). Plus as a bonus 6 generic weapon crews with berets. The original plan for these dudes (when I got them anyway) was to build heavy weapon teams for my DPRG troops. That range has no crewed weapons and I felt that the models with berets would look ok beside the helmeted infantry.

The old plasma guns are nothing to write home about in design.  However my Mercs needed something to represent GPMGs or medium plasma guns so these were better than nothing and 4 crewmen is just enough to make two teams.


My DPRG would be rewarded with a heavy machinegun/autocannon and an automatic grenade launcher.  All four were done in the same scheme as the mercs, with the only difference being the berets were painted in Vallejo German Uniform (to match the body armor of the DPRG). 


The question is, "What to do now?" 

I have so many model ranges to paint that choosing the next project is becoming difficult.  I try not to duplicate color schemes between model ranges, so coming up with new and unique paint schemes is a bit of a struggle for me.  I can copy/mimic almost anything I see, but coming up with original schemes is not something that comes natural to me.

The following are in my queue waiting for paint.  

  • GZG UNSC Hardsuit Marines (50+)
  • GZG ESU Naval Infantry (40+)
  • GZG FSE helmeted Infantry (40+)
  • GZG NI Heavy Infantry (60+)
  • GZG Mercenaries, bareheaded (50)
  • GZG Civilians (32 models)
  • GZG Armed Civilians (24 models)
  • GZG Assault Team (16 models)
  • GZG Colonial Militia (24 troops)
  • GZG Alien Mercs (30+ troops)
  • GZG Crusties (32)
  • GZG Ravagers and Armed Space Crew (24 models)
  • Khurasan Soriogs (30+)
  • Alternative Armies (dozens of individual aliens and small monsters)
  • almost 50 vehicles from GZG, Khurasan and Old Crow
This year I have painted large forces from the following ranges:
  • GZG Mercenaries
  • GZG Xar
  • GZG Crusties
  • GZG Cal-Tex
  • GZG Kra'Vak
  • GZG UNSC Light Infantry
  • GZG Armored SWAT
  • GZG Tomorrows War Brazilians
  • GZG Tomorrows War US Marines
  • Laserburn Imperial Troops
  • Alternative Armies Alien Greys
  • Brigade Models Polish infantry
  • Khurasan Xenomorphs
  • Khurasan Lhurrg
  • too many robots of various types to count
Needless to say I am suffering from a bit of burnout.  Projects are a lot easier when I have a painting plan to work from.  However, at the moment I am a bit lost, at least when it comes to the human models.  

Monday, 5 October 2020

Using Army Painter Dips & Minwax - Tips and Tricks

When using either Army Painter Dips or Minwax Polyshades on miniatures there are a couple of tips that might be helpful to those who are new to those products.  


Model Preparation

Both products will slightly alter the base color underneath, similar to a wash.  This may be desirable.  However, if not you can mitigate this by applying a Gloss Coat prior to varnishing (this is applicable when applying traditional washes as well).  When varnishing vehicles I always add a gloss coat.  The coating allows the varnish to move more easily across the model surface (viscosity) and allows you to remove it if necessary (say on large flat areas or panels....Old Crow vehicle models are a prime example of why you should use a gloss coat) and tends to preserve the original colors more.  


Application

Never dip.  Ever.  Always use a brush.  Start from the top and work down.  You do not need a lot to cover the model.  Using excessive amounts will only increase pooling and your work load as you struggle to remove the pools.  Remember, you can always add more later.  Clean your brush will mineral spirits when done.


Thinning

Both products are rather thick.  This is less of an issue on larger models, but at 1:100 scale or smaller it can become a problem.  Therefore I suggest that you decant whatever amount you are planning to use into a small container, like a paint pot or similar vessel and thin the varnish with mineral spirits (I use Gatorade drink bottle caps after my sons are done with them).  Dollar Store Paint Pots are a perfect choice if you can get them.  Do not thin past 30% or the products will separate and you will have a mess.  I suggest between 10-20%.  Start low and work up if necessary.  Make sure you mix the contents well and periodically during its use.  Use an eyedropper bottle for the mineral spirits.  This prevents you from over thinning and is just easier overall.  


Dry Time

It can take up to one day for either product to completely dry.  This creates delays in completing painting projects.  This may or may not be an issue for you.  If you wish to speed up the process when you can bake your models in an oven at 170 degrees for one hour.  The models will be completely cured and you can continue your project.  Keep in mind that this works best with metal models.  Resin can be cured but thin objects like barrels can possibly warp due to the heat.  You can straighten these without too much difficulty though.  Your Significant Other may not appreciate you using the oven for paint curing.  If so, do it when they are absent, or asleep.  


Matt Varnishing

I do not suggest using Testors Dullcote on models done with either product.  I have found that the Dullcote will create a crackling effect on the varnish surface occasionally.  It does not happen every time and can happen even if the models are fully cured for days.  I only use acrylic varnishes, all sprayed through my airbrush.  Theses products will not negatively interact with the Polyshades/Army Painter varnishes.  Brush on matt varnishes are an option, such as Vallejo or Mig.  


Post Shade Highlighting

After matt varnishing I almost always do a post-shade highlight on select areas of the model.  When highlighting anything I use two colors, layered over each other.  This step is not required but it will make the models pop and add visual appeal.  The exception are vehicles: I use Tamiya Weathering Pigments for all post-shade highlighting needs.  


Minwax Polyshades to Army Painter Equivalents

Army Painter is expensive, especially when it is basically just relabeled Minwax.  I have used both products and found no appreciable difference between the two.  The Minwax equivalents to Army Painter are:

Soft Tone > Pecan

Strong Tone > Antique Walnut

Dark Tone > Tudor


I have found that Tudor works are almost anything and is my go-to for 15mm projects.  Pecan is good for light earth tones and alien skin colors.  Polyshades come in many colors which allows for some interesting effects which cannot be done with Army Painter due to its limited range. 


15mm Sci Fi - GZG Mercenaries infantry complete


Sunday was a busy day for me.  I was determined to complete my GZG Mercenary force no matter what.  I started at 0730 hours and stopped at 1830.   Keep in mind that I was working to a previously completed paint scheme, so I had a recipe to follow which made things a lot easier.


GZG Mercenaries


When working with Army Painter Dips or Minwax I cheat with the drying time.  Rather than wait for the products to cure via air drying I cure them in my oven, baking them 170 degrees for one hour (leaving the door partially open).  This allows me to finish projects which would normally take several days due to the varnish cure time.


For basing I use the same method for everything: sand, painted with Tamiya Flat Earth, drybrushed with Reaper Yellowed Bone and flocked with Woodland Scenics Earth Blend, Green Blend and Weeds.  

GZG Mercenaries and GZG 2mm Mechs

The mechs are a little short.  I put them on bases to give them extra height.  In hindsight I regret this.  I will likely use a hairdryer to loosen the superglue bonds and remove the washer at a later date.

This brings my GZG Mercenary force to an even 100 men and robots.  Vehicles are next.


Saturday, 3 October 2020

15mm Sci Fi - GZG/Old Crow Mercenary WIP Project

 I am trying to finish off my GZG Mercenary force this weekend.  Normally I only show finished models.  Consider this a sneak preview of things to come.

My GZG Mercenary force is large, almost 100 men and robots.  A small portion of this force was shown on this blog earlier this year.  This batch will finish them off.  The infantry are basecoated and ready to go.  I have hundreds of paints, from Vallejo, Reaper, MIG the list goes on   However I find that usually I end up using something for Tamiya for my basecoats   Their color pop range is good and they airbrush perfectly, drying very quickly as well.   They don’t brush well at all though, unless you use their thinner or 99 percent alcohol.   


The vehicles are all Old Crow.  I have finished 3 Trojan Grav APCs already in the scheme I will be using.  It is a generic monochrome scheme that will go with my Laserburn Imperial Troops, UNSC, Mercs and my Asgard Marines.  I needed a neutral color that would go with red, tan and grey white.   My wife says I succeeded. 

Infantry are always hot glued to sticks and airbrushed.  A hairdryer is used to remove them when complete.  I always line up identical troops on single sticks.  This keeps things simple and speeds up the painting process.  


Old Crow vehicles are modular.  If you place an order, get extra turrets.  You never know what you may need.  I always add extra bits - hatches, pintle mounts, extra weapons, whatever.  Wheels are done separately if I can help it; hot glued on sticks and airbrushed.  Vehicles are always done all in one day.  That way I can keep my technique uniform across a whole vehicle pool.  

Stowage is done separately.  It is attached to sticks and airbrushed and then painted with GW Contrast Paints.  I then attach them later as I see fit.  These vehicles will likely get very little since the armies they will be paired differ from each other quite a bit.


This vehicle scheme was super simple:

  1. Tamiya Medium Grey.
  2. Vallejo USAAF Light Grey on the panels.
  3. Vallejo Grey White on the panel centers
  4. Vallejo Sea Grey for odd bits just to make them pop.
  5. Pintle mounts done in Dark Sea Grey
  6. Windows Vallejo NATO Black
  7. Gloss coated and then washed with Minwax Tudor Polyshades (thinned, always thinned)
  8. Windows highlighted with Reaper Sapphire Blue, True Blue and Sky Blue.
  9. Missiles done in Flat White.
  10. Decals will be added at a later date.


The scheme gives a good generic sci-fi look and fits well with at least four other armies that I have.  Yes I do not have a problem swapping out vehicles from one army to the next.  With almost 15 human armies I cannot possibly have a separate vehicle pool for all of them.  


I maintain a large supply of bits.  Whenever I make a GZG order I always grab extra stuff and never throw anything away.  


Tuesday, 29 September 2020

2020 painted model count so far


Short post today.  I did a quick count of what I have painted so far since May of this year.


(24) 28mm figures

(100) 15mm Sci Fi Vehicles / Mecha / Large Monsters

(1280) 15mm Figures (counting weapon teams with multiple models as 1 figure)


This does not take into account painted and stripped models, 200+.  

Not one game played.  

I think I need a break.

Monday, 28 September 2020

15mm Sci Fi - Alternative Armies Psychoborgs

 Cyborgs are a staple of Sci-Fi.  Recently I was in the market for some larger models to use as heavy droids for my Alien Squad Leader Mechanoid army.  In the past I have used Tau Gun Drones, GZG and Laserburn models.  However, I wanted something to go with the HOF Giant Mechanoids that I had planned to add to my army.  These guys seemed to fit the bill: big, scary and skeletal looking.


The models were not cheap.  The British Pound to Canadian Dollar is almost 2:1, so these six were almost $40 loonies for me.  Normally I would not shell out that sum for six models but they were what I was looking for and I cannot blame AA for the exchange rate.

GZG Robot, GZG Gun Drone, GZG Spider Droid, GZG Spider Droid (converted), Alternative Armies Imperial Warbot, Alternative Armies Psychoborg

The Psychoborgs are the same size as GZG NAC Battlesuits, GZG Crusty Walker Battlesuits and the Khurasan Corsair Battlesuits.  They are definitely larger robots, on par with scout mecha in 15mm.


The models were airbrushed in my standard metallic format.  I added some color by using Tamiya Clear Reds, Greens, Blues and Yellows to various areas.  Flames are just cotton, airbrushed various oranges.  Eyes were done in my usual way: Reaper Fire, Phoenix Red, Fire Orange and White.  Everything was then washed in thinned Minmax Tudor Polyshades, my go-to for 15mm.

Since my Mechanoid and Cyborg Enslaver armies are metallic I kept the same look.  No need for fancy stuff.


I am quite please with these models.  They were easy to assemble and very little cleanup was required.  The varying weapons are a nice feature, making these guys fit well into large skirmish games.


Visitor Total